Introduction
Stitching cracked brick walls is a meticulous process that involves reinforcing the structure to restore its integrity. Cracks in brick walls can occur due to various reasons, including structural issues, settling, or external factors. This comprehensive guide will walk you through the detailed steps involved in stitching a cracked brick wall, ensuring a durable and effective repair.
Comprehensive Guide to Stitching Cracked Brick Walls
Materials and Tools
Before diving into the repair process, it’s crucial to gather all the necessary materials and tools. This includes:
- Masonry Drill: A reliable masonry drill will be essential for creating holes in the brick wall.
- Metal Ties or Stitching Bars: These are the primary components that will bridge the gaps in the cracked wall. These can be Steel reinforcement bars usually used in reinforced cement concrete structures.
- Epoxy Resin or Grout: A high-quality bonding agent is necessary to secure the metal ties and provide additional strength to the repaired area.
- Wire Brush: Used for cleaning the cracked area, removing loose mortar, dust, and debris.
- Safety Equipment: Always prioritize safety with gloves and safety glasses.
- Masonry Chisel and Hammer: These tools help in opening up the crack and creating a V-shaped groove for better bonding.
Steps to Stitching a Cracked Brick Wall
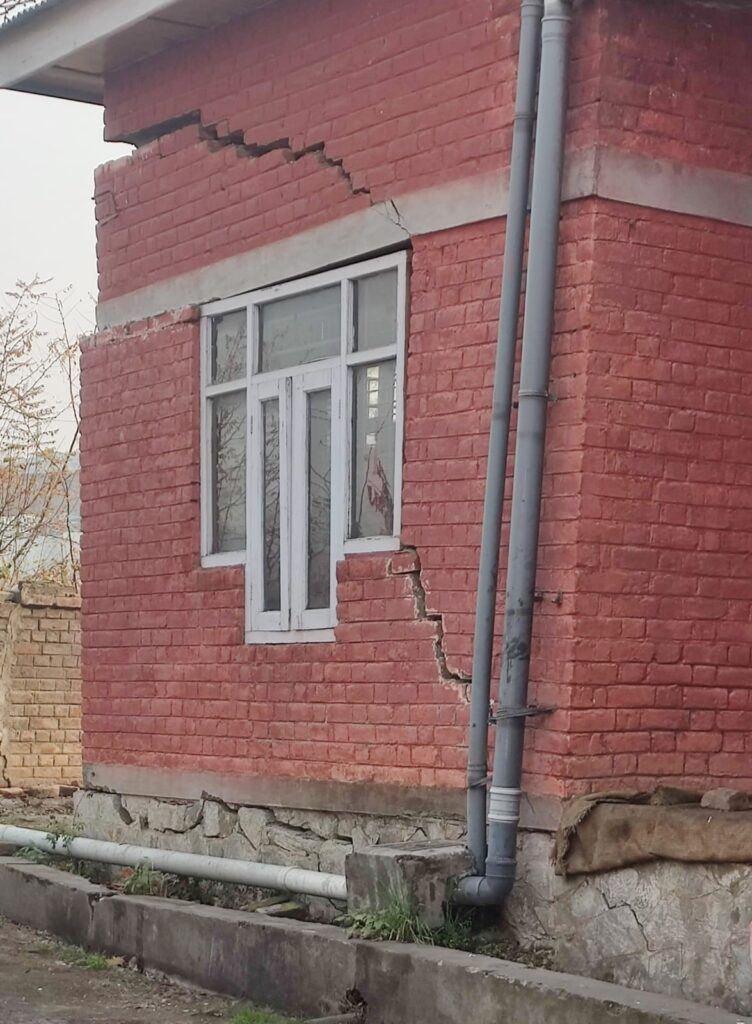
Step 1: Assessment
Before starting the repairing process, we shall carefully examine the cracked wall to assess the extent and location of the cracks. Determine the root cause, whether it’s structural issues, settling, or there are any other factors. This initial assessment will guide the repair strategy more effectively.
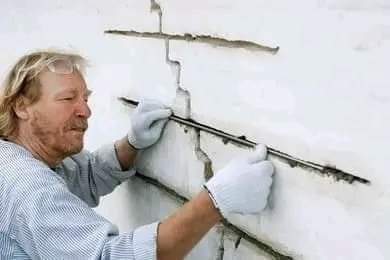
Step 2: Prepare the Surface
Cleaning the cracked area is crucial for a successful repair. Use a wire brush to remove any loose mortar, dust, and debris. If the crack is not sufficiently exposed, use a masonry chisel and hammer to create a V-shaped groove, providing a better surface for bonding.
Step 3: Drilling Holes
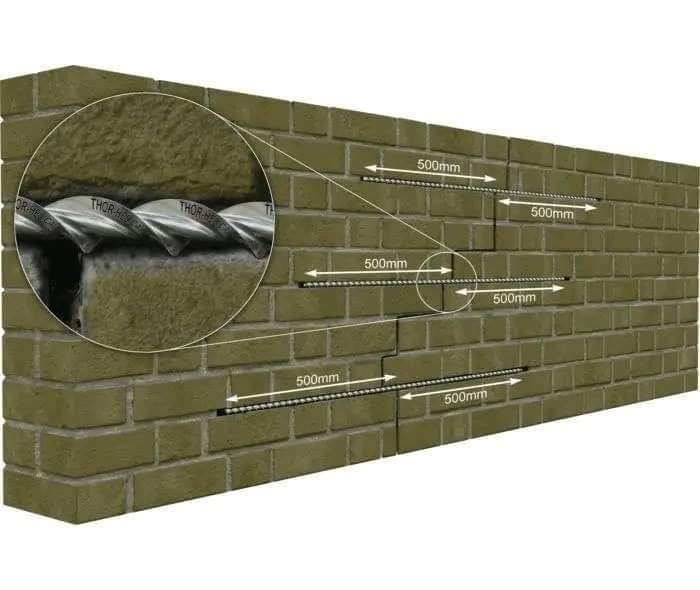
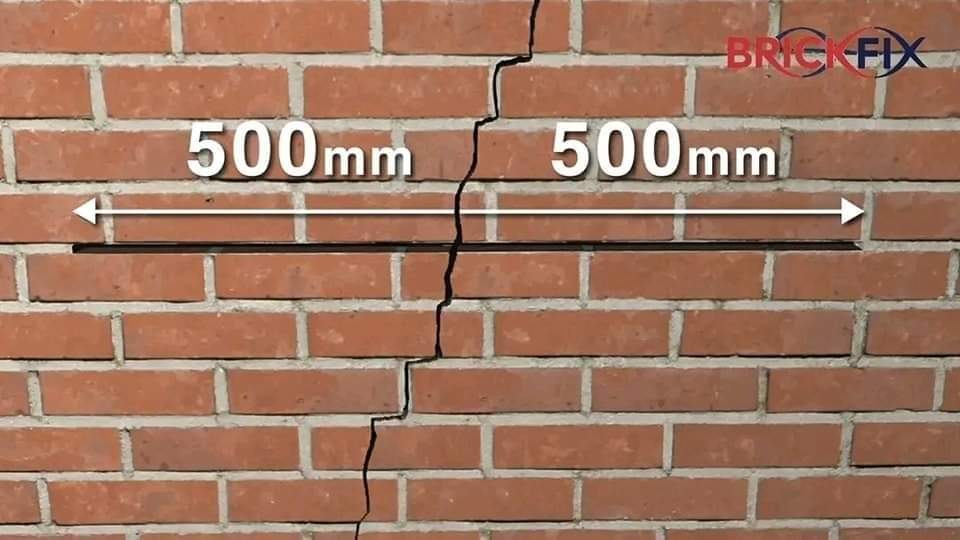
Use a masonry drill to create holes along the length of the crack. The spacing of these holes is typically between 12 to 24 inches. Drill through both sides of the crack to allow the stitching material to pass through, ensuring a thorough and comprehensive repair.
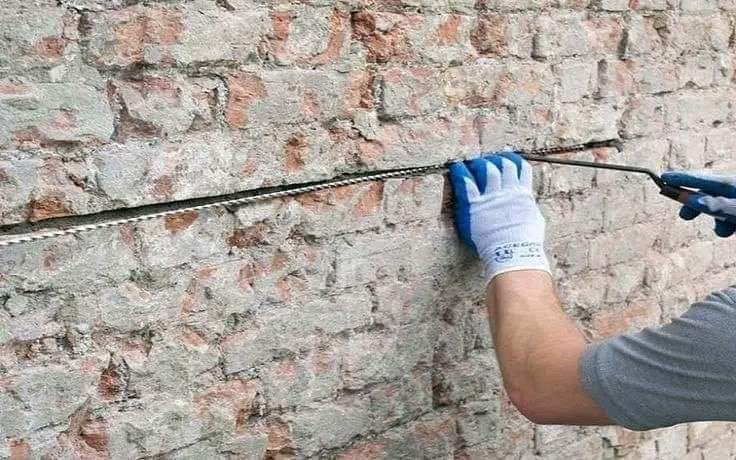
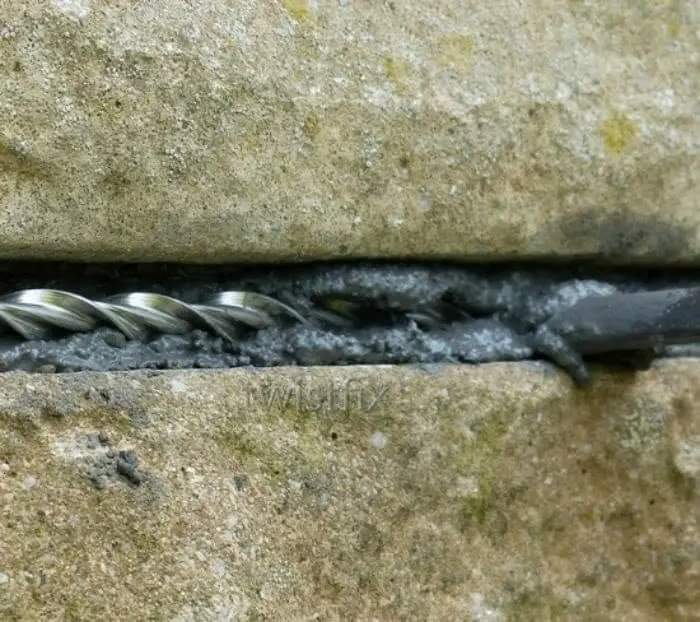
Step 4: Inserting Metal Ties
Metal ties or stitching bars are the backbone of the stitching process. Insert them into the drilled holes, ensuring they span the entire length of the crack and protrude on both sides of the wall. To enhance adhesion, consider coating the ties with epoxy resin or another suitable bonding agent before insertion.
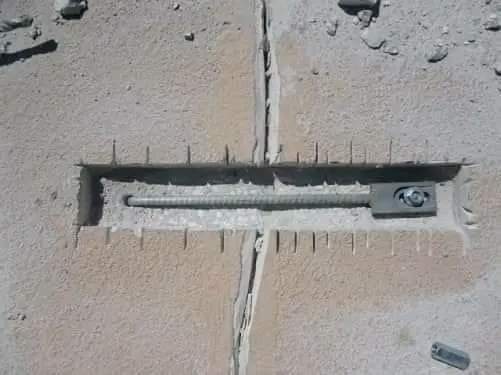
Step 5: Securing Ties
Once the metal ties are in place, secure the protruding ends on both sides of the wall. This can be achieved by bending the ends or using nuts and washers. The goal is to create a tight fit that pulls the separated sections of the wall together, effectively closing the crack.
Step 6: Grouting or Epoxy Resin Application
Prepare the epoxy resin or grout according to the manufacturer’s instructions. Fill the drilled holes and any gaps in the crack with the bonding material. This step not only secures the metal ties but also provides additional support to the repaired area, preventing further movement.
Step 7: Finishing
After the stitching and bonding process is complete, it’s essential to clean any excess epoxy or grout from the surface. A damp sponge or cloth can be used for this purpose. This ensures a neat and polished finish to the repair.
Step 8: Repairs to Mortar Joints
If the cracks extend into mortar joints, additional steps may be required to repoint these areas. Repointing involves removing damaged or deteriorated mortar and replacing it with fresh mortar to ensure the overall structural integrity of the wall.
Step 9: Monitoring
After completing the repair, it’s crucial to monitor the stitched area regularly. This involves inspecting the repaired section over time to ensure that the stitching is holding and that no new cracks are forming. Regular monitoring is essential for identifying potential issues early on.
Professional Consultation
While this guide provides a detailed overview of the stitching process, it’s important to emphasize the significance of consulting with a structural engineer or a qualified professional before undertaking significant repairs. A professional assessment ensures that the chosen stitching method is suitable for the specific characteristics of the cracked wall, guaranteeing both safety and long-term effectiveness.
Conclusion
Stitching a cracked brick wall is a methodical process that requires careful planning and execution. By following the steps outlined in this comprehensive guide, you can address cracks in your brick wall effectively, by restoring its structural integrity and preventing its further deterioration. Remember, safety should always be a priority, and when in doubt, seek the expertise of professionals to ensure a successful and lasting repair.
Read also: CONSTRUCTION OF GABION RETAINING WALLS
Read also: BRICKS, CLASSIFICATION OF BRICKS.


1 thought on “Stitching Cracked Brick Walls – A COMPREHENSIVE GUIDE.”